March 9, 2022
New update (April 2026): Debian desktop + Docker (no Raspberry Pi SD card dance)
In 2022, the practical “it just works” path for me was an older Raspberry Pi OS image (Buster-era) on a Raspberry Pi 4B, as described below.
In April 2026, I repeated the same end goal (Neo/Tuya ESP8266 device → Tasmota via tuya-convert), but on a Debian desktop with:
- Qualcomm WCN785x Wi‑Fi (
ath12k_pci, interfacewlp8s0) - Docker (
docker build/docker run --privileged --network host) using upstreamtuya-convert’s Dockerfile flow - A wired Ethernet uplink on the PC while the Wi‑Fi adapter is temporarily repurposed as the
vtrust-flashAP
What felt different vs the Pi era:
- Phone behavior matters more than it should: modern Android will sometimes refuse to “stay” on an AP without internet, or bounce you back to mobile data / another SSID unless you explicitly keep the connection.
- Non-interactive automation is painful unless you add small guardrails:
tuya-convertprompts for firmware selection; in scripted runs that can spin forever waiting for a single keypress.
Net: the old “use Buster on a Pi” lesson is still directionally correct (reduce friction, control the Wi‑Fi/AP stack), but a modern Debian + Docker host can work if the Wi‑Fi chipset cooperates and you treat the phone/AP step as a first-class requirement.
Fork / reproducible tree for the 2026 run (includes small automation hooks + notes): stulluk/my-tuya-convert
TL;DR:
I succesfully programmed my Neo Wifi PowerPlugs with tasmota firmware by using tuya-convert over WIFI ( Without connecting UART )
The trick was to use an old ( buster ) debian version on the raspberry pi 4b - 4G.
Introduction
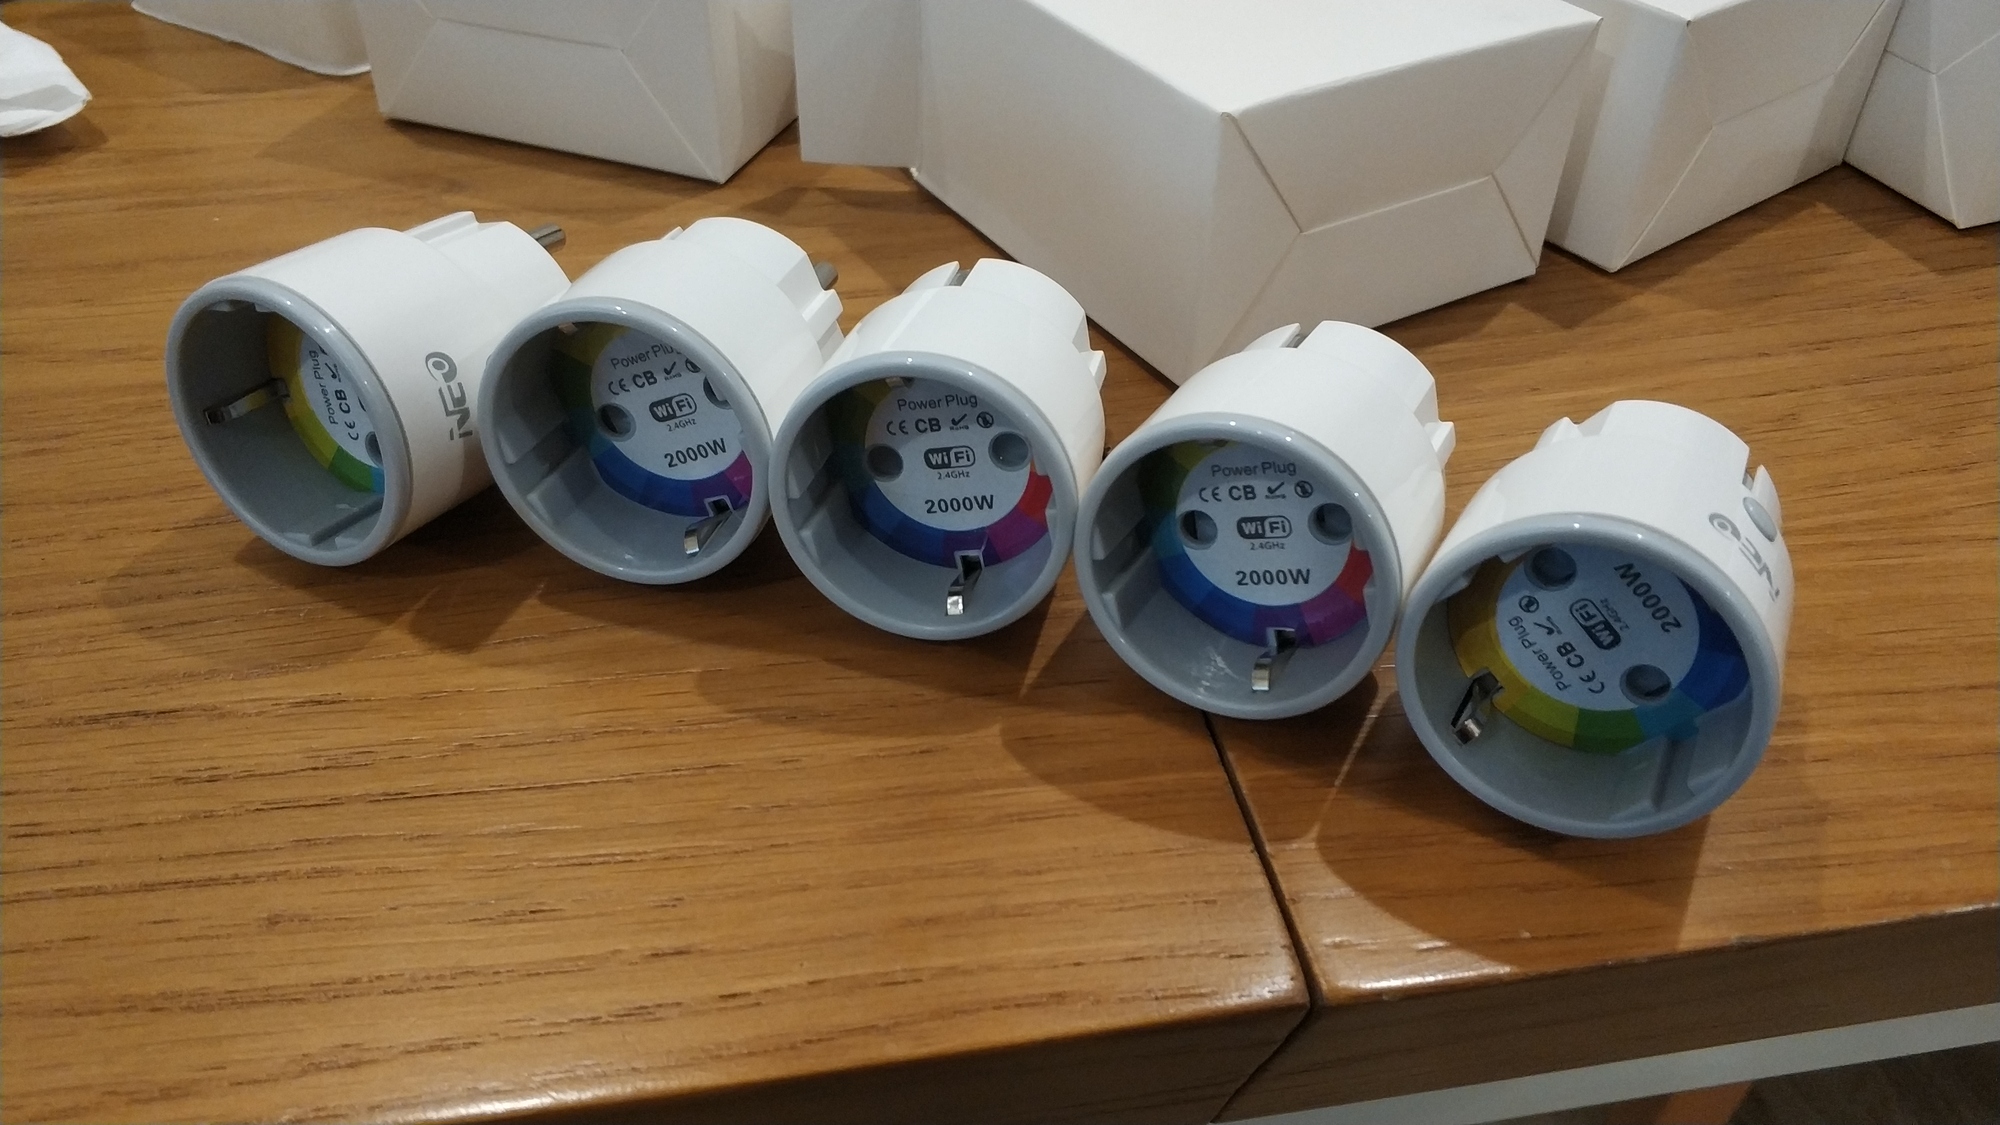
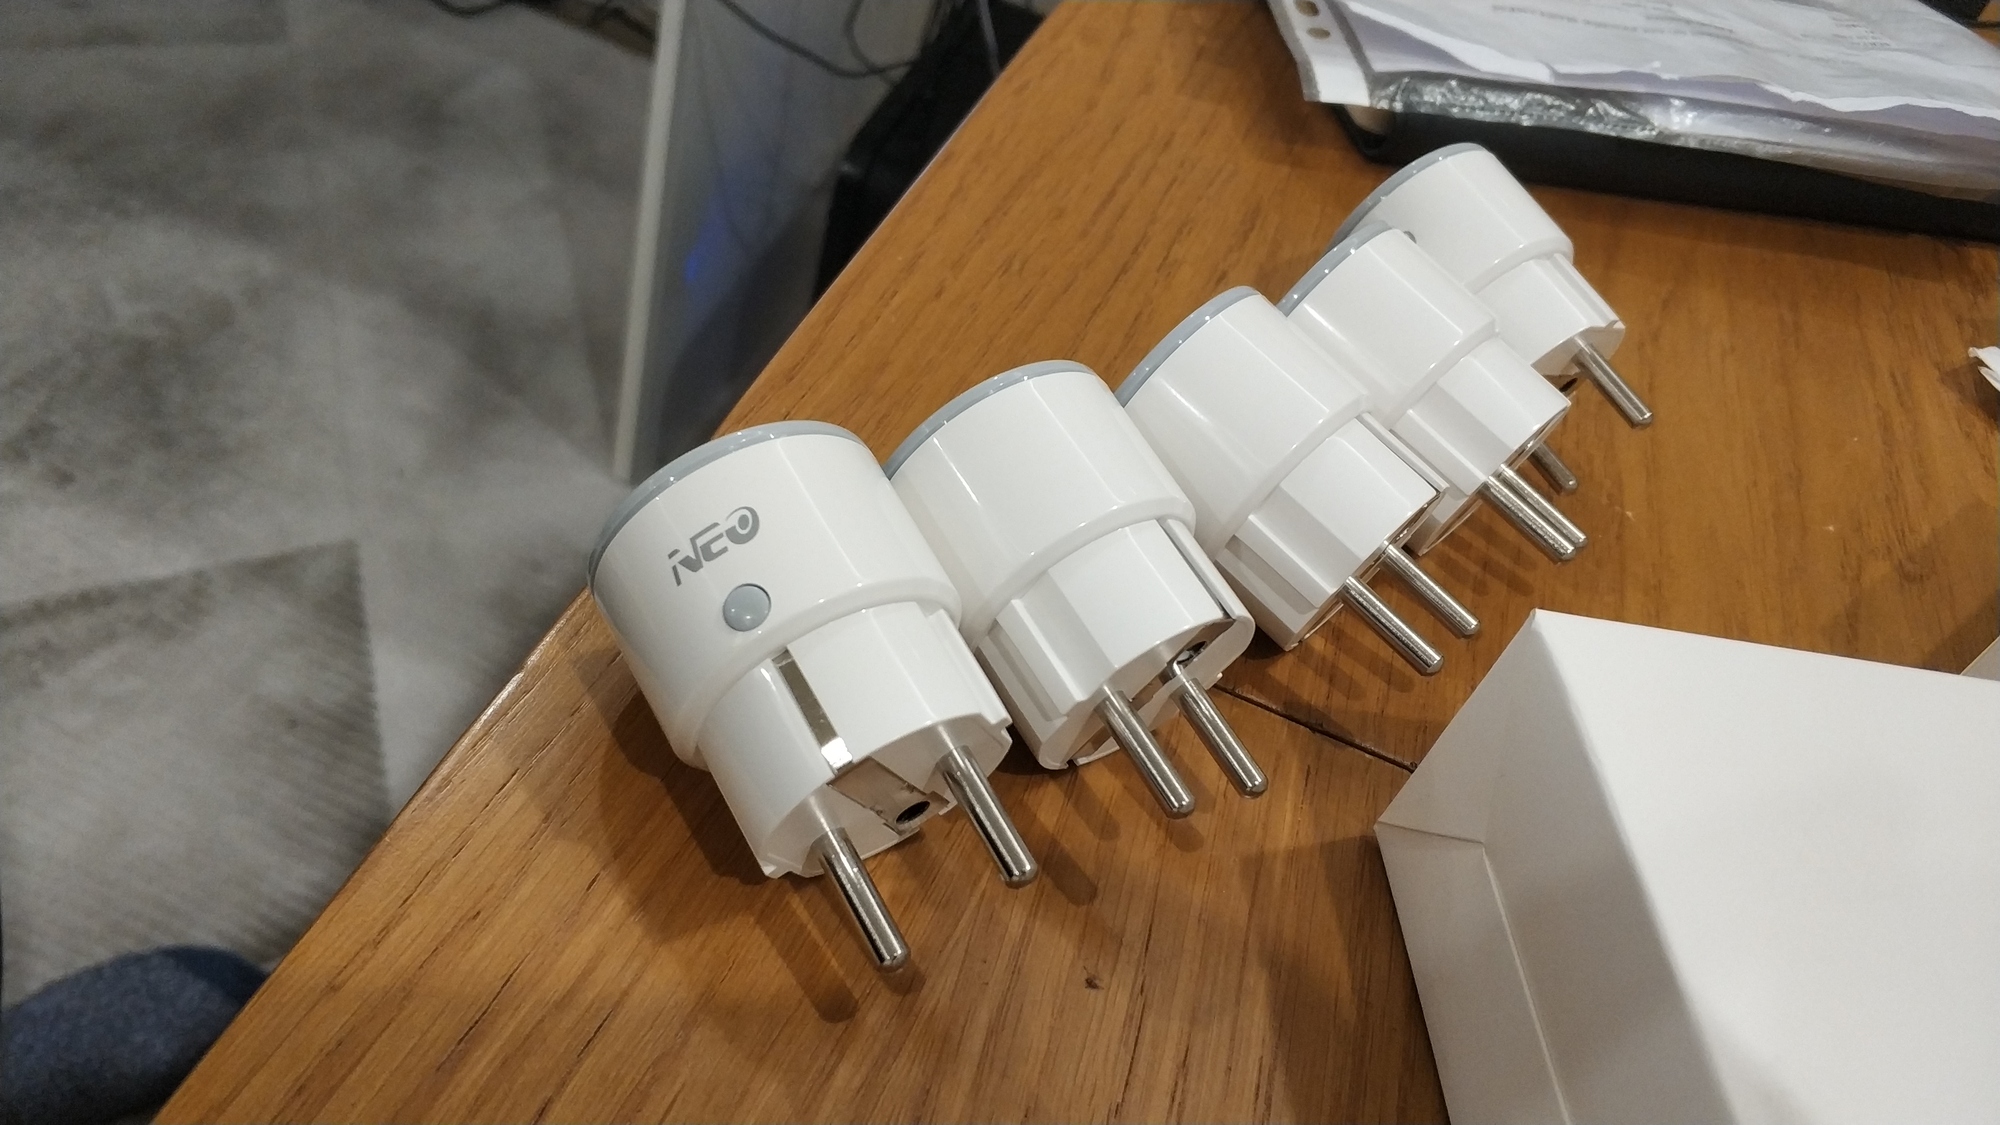
Below is a Neo Wifi PowerPlug (Neo PP) from China. It is manufactured by Szneo ( https://www.szneo.com/ )
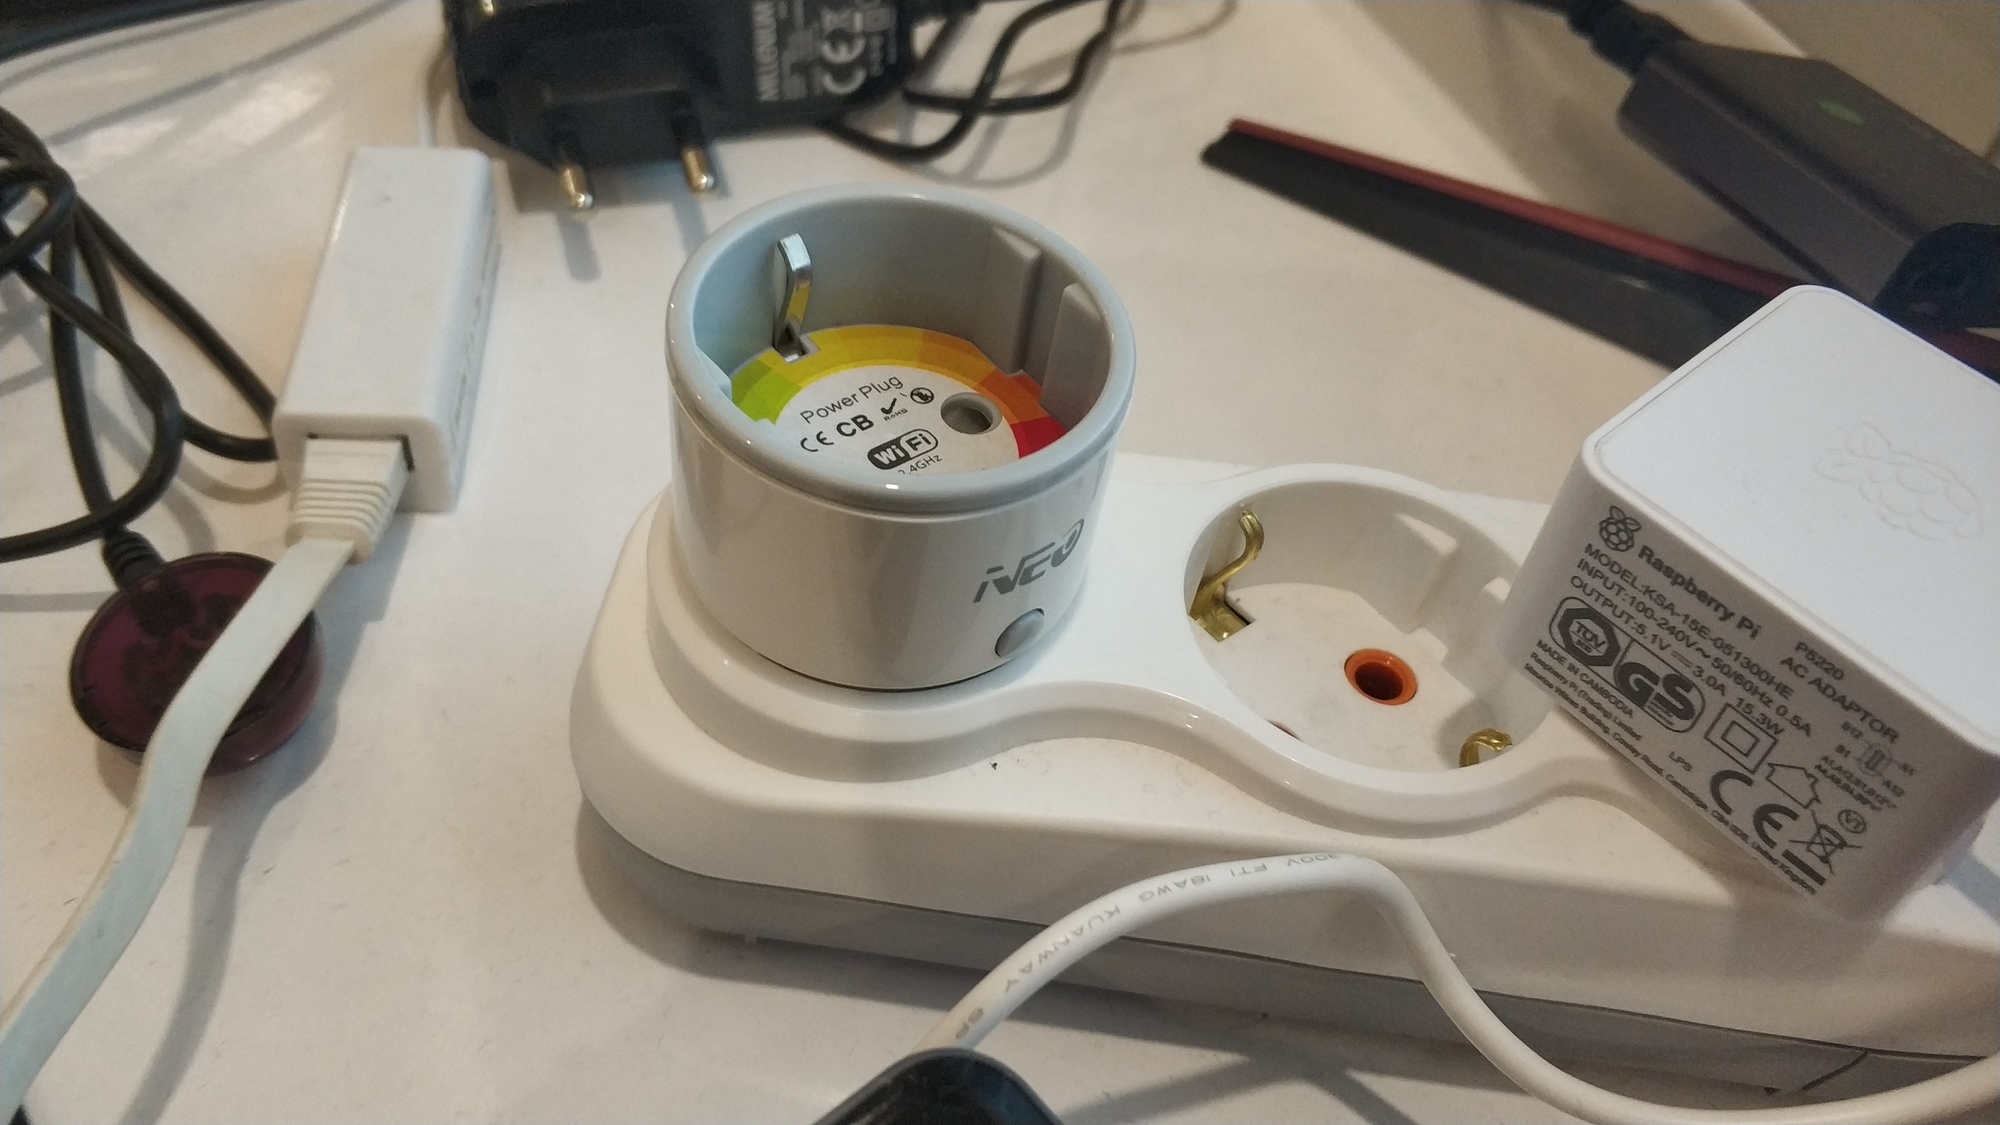
It has an ESP8266 based Wifi Module inside. This module runs a proprietary Firmware, which is designed & developed by TUYA ( https://www.tuya.com/ )
This proprietary firmware communicates via Tuya Cloud and lets users to control such home automation devices over internet ( both local and remote )
However, this requires you to install Tuya mobile app on your phone and there is no way to send command to your tuya device in a simple or reliable way.
Note: there are such projects: https://github.com/TuyaAPI/cli but I couldn’t be able to register / attach my devices.
I wanted to control such devices with command line on my Linux desktop computer.
The solution is: Tasmota Firmware ( https://tasmota.github.io/docs/ )
Tasmota is an open source firmware for ESP based devices. I will not go into more details since it already has a great documentation.
For an alternative, see ESPurna.
Problem-1: No Uart Exposed outside
In order to install Tasmota to an ESP based device, you will usually need a UART connection.
Neo PP has an extremely compact mechanical design. There is no UART exposed to outside and it is very hard to reach its UART pins for programming Tasmota Firmware.
I broke two Neo PP device while trying to open its cover and solder its pins.
However, there were some people out there who managed to do it: https://www.youtube.com/watch?v=CV8Y61gEQpQ&t=2s
Solution to Problem-1
To solve this issure, there is a great tool called tuya-convert: https://github.com/ct-Open-Source/tuya-convert
Tuya-convert works as a man-in-the-middle, and fakes OTA upgrade of the system, and installs tasmota ( or espurna fw binary ) to your ESP based device without soldering cables
Problem-2: tuya-convert timeouts while installing tasmota
I used tuya-convert for about a year ago and it was working fine. After a year, I wanted to use it again to program Neo Powerplugs and unfortunately, it never worked. So I decided to open this issue: https://github.com/ct-Open-Source/tuya-convert/issues/1022
Solution to Problem-2
Today I got a great feedback from @Kintel and he reported that using an old version ( such as Debian 10.10 - Buster ) with a RaspberryPi4 , it worked fine.
Then I decided to give a try.
Note: I forgot that default images mostly doesn’t enable serial terminal , so I lost big time to understand why downloaded images were not working :( My bad.
Prerequisities ( What you will need )
First, read this: https://github.com/ct-Open-Source/tuya-convert/blob/master/README.md
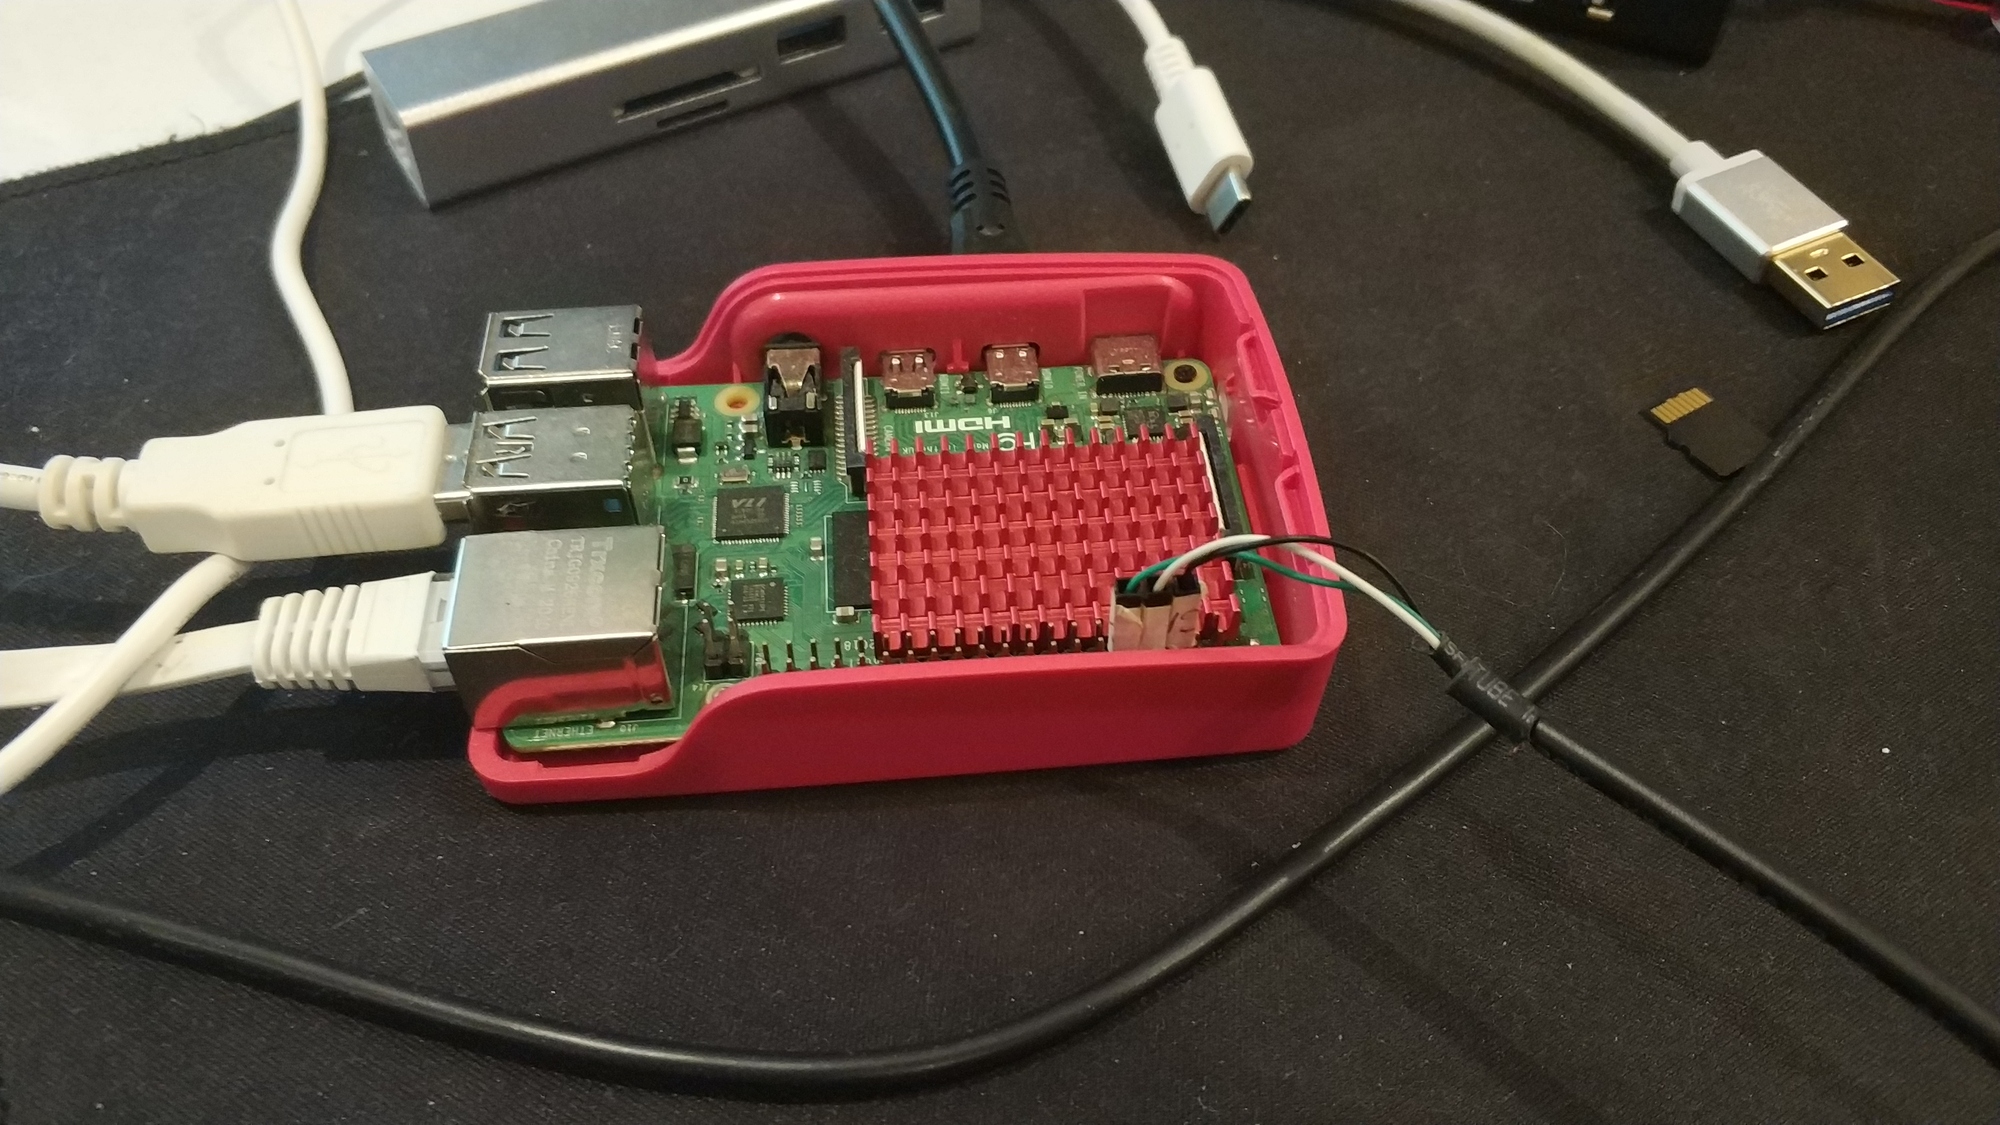
- An RPi with a built-in Wifi ( I had a Rpi4b-4Gbyte model)
- An SDcard Writer
Easy way for the reader
I dumped my SDcard and put it here for the community: https://drive.google.com/file/d/1kfnwF5ofcHy8CO_yRMWNFfuxvwjJzHAQ/view?usp=sharing
username : pi password : 1 ( single character )
So you can just burn this image ( don’t forget, it is zstd compressed ) to an SDcard, and insert to your Rpi4b. On the first boot, give some time to it, until it resizes rootfs.
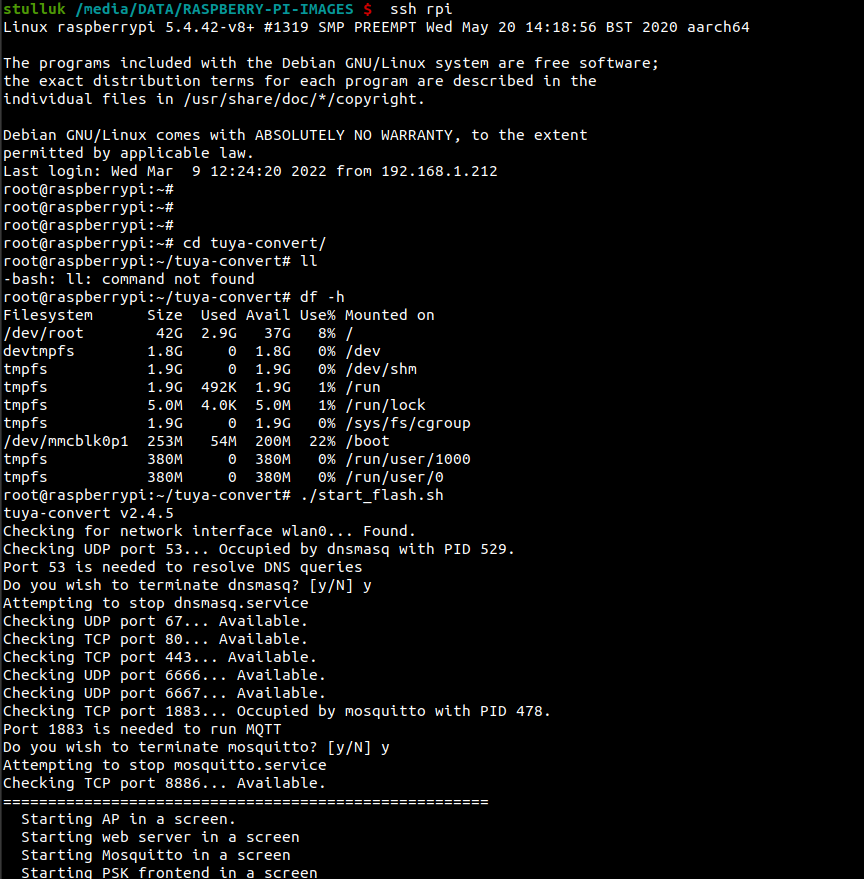
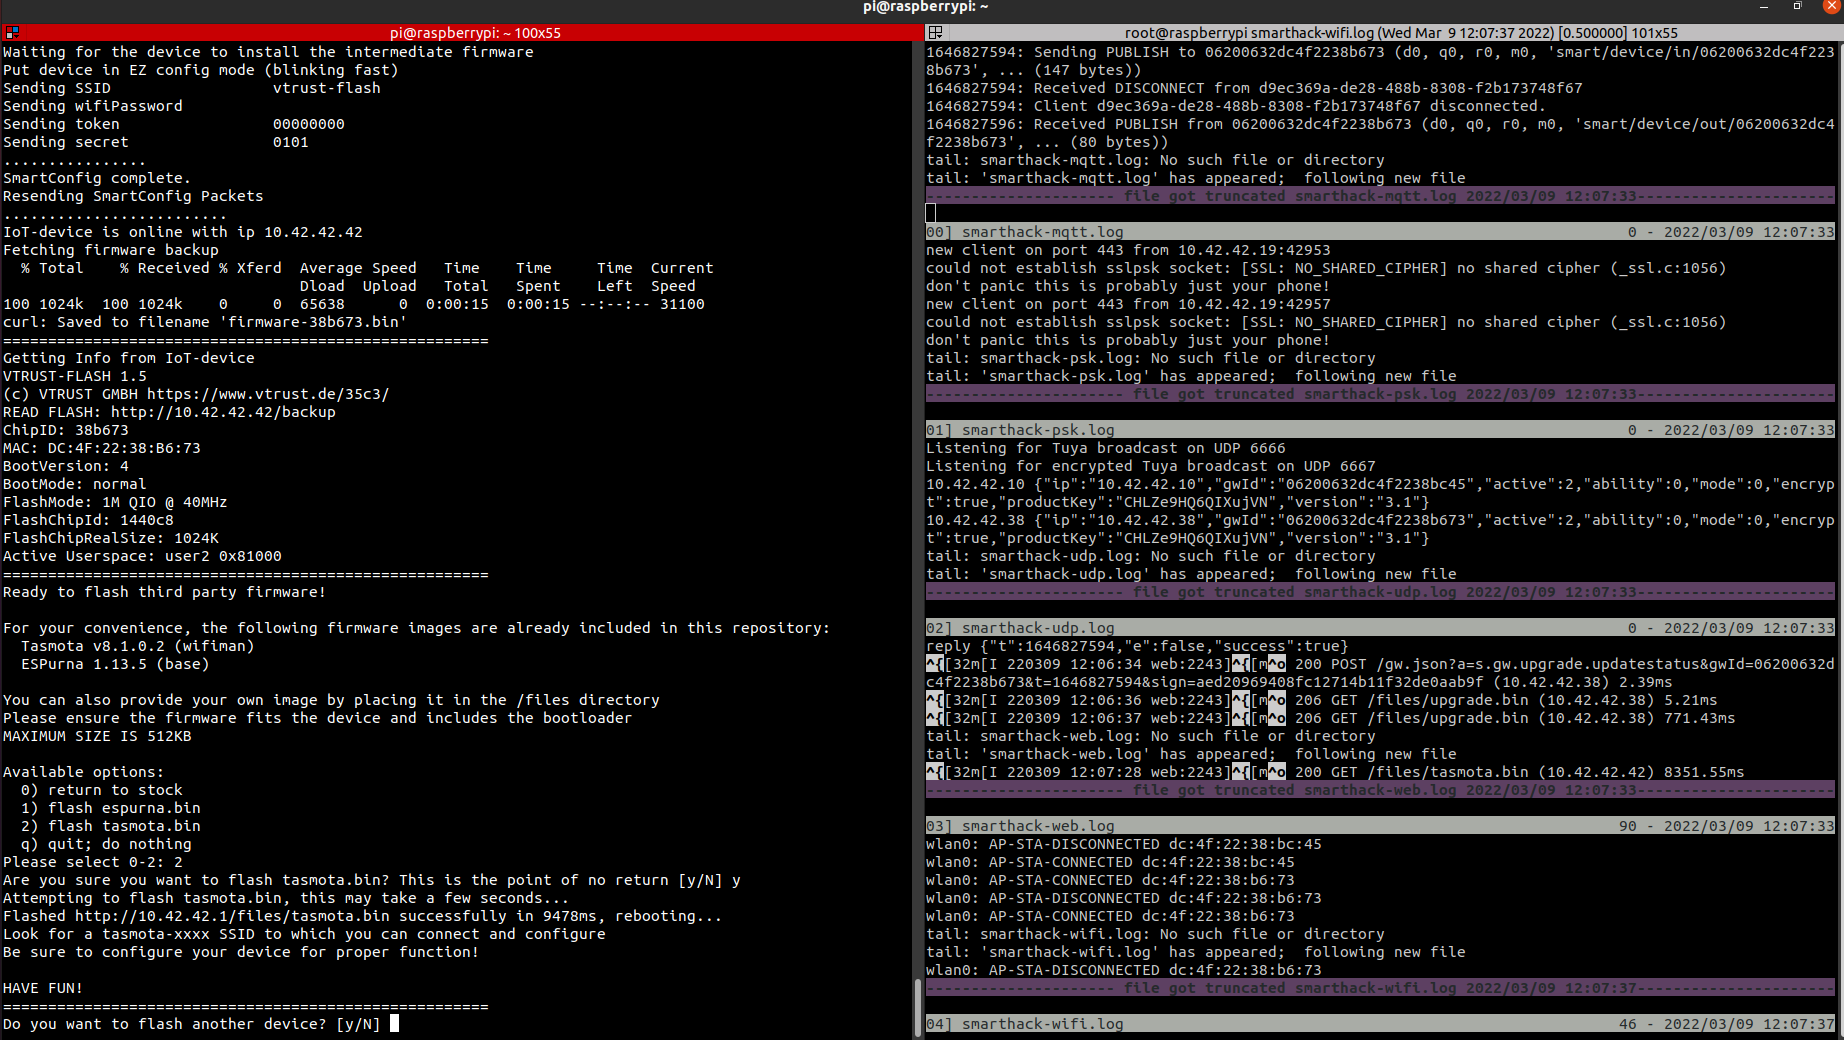
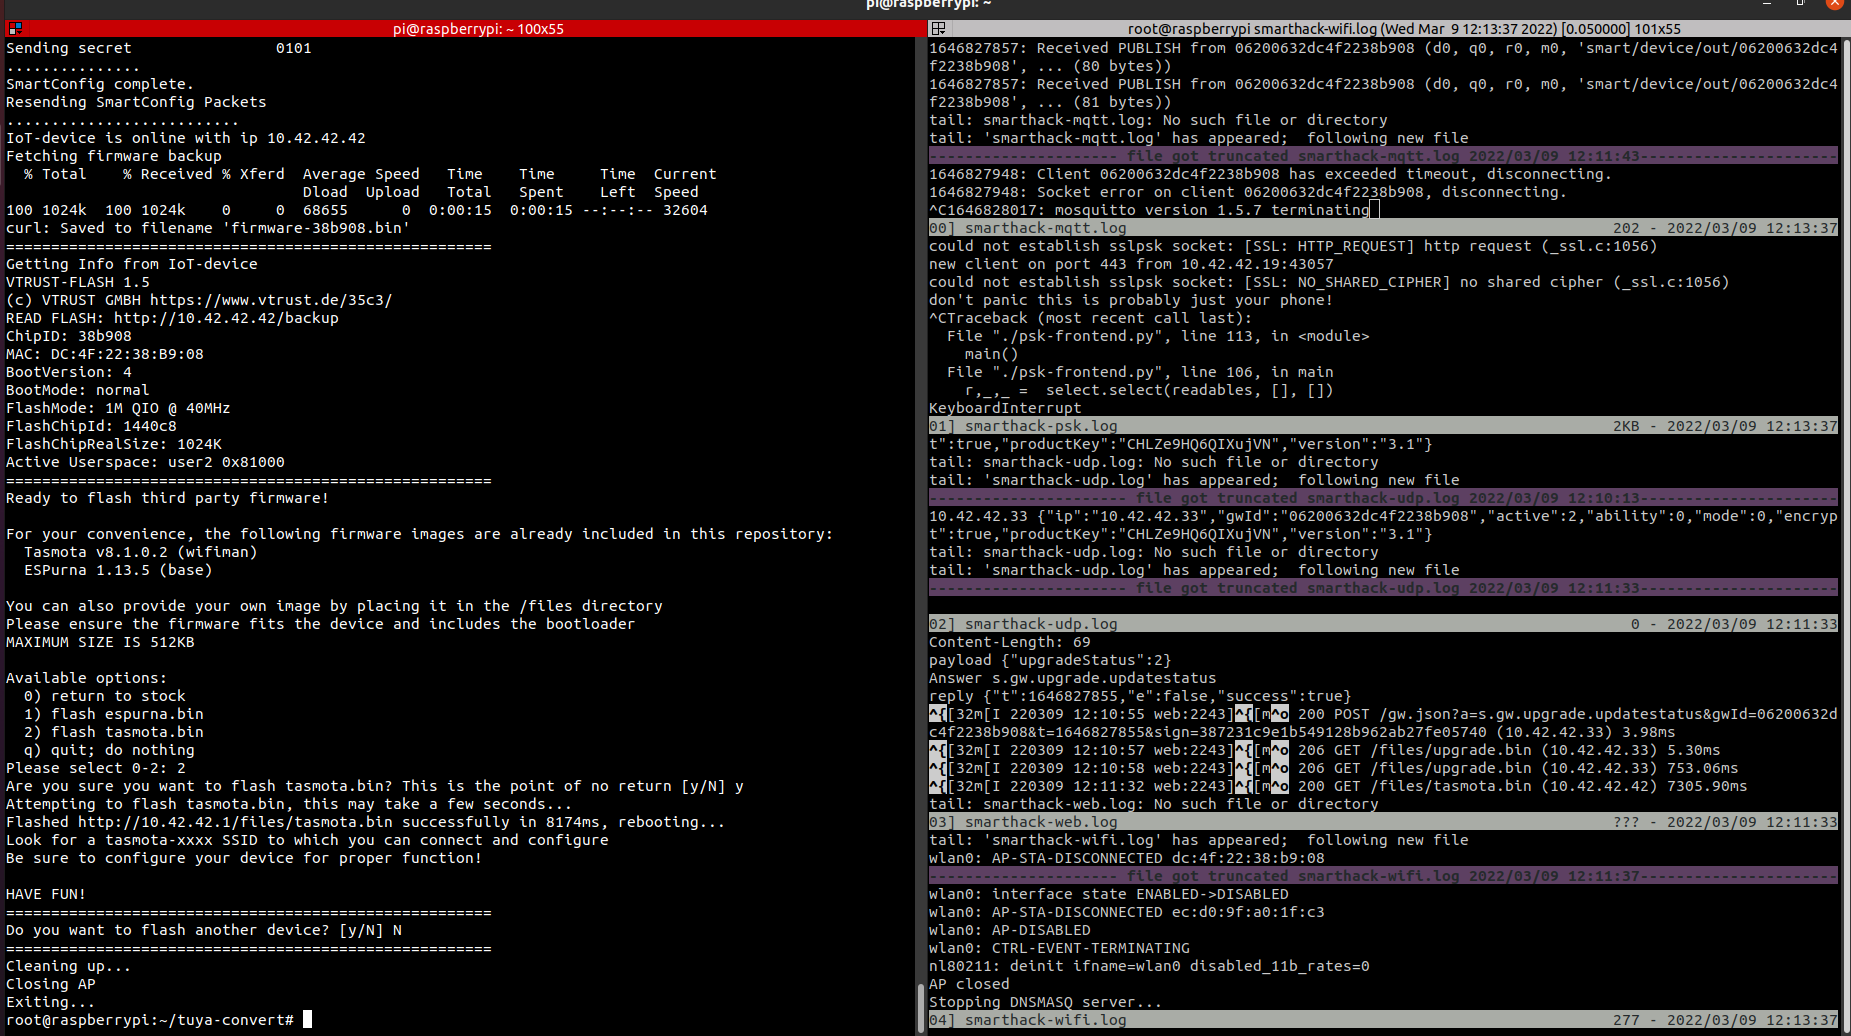
Then go to /root/tuya-convert directory, and just execute ./start-flash.sh
Steps to reproduce above image
I downloaded this image: https://downloads.raspberrypi.org/raspios_arm64/images/raspios_arm64-2020-05-28/2020-05-27-raspios-buster-arm64.zip
write it to an sdcard
Connect your Rpi4b-4g to internet with ethernet cable ( we will use built-in WIFI of the Rpi, so you can’t use wifi )
Let it boot. Connect to a monitor with HDMI, so that you can setup SSH to it ( by simply creating a file named “ssh” - with content doesn’t matter - in the /boot directory or partition )
sudo install vim git
git clone https://github.com/ct-Open-Source/tuya-convert.git && cd tuya-convert && sudo su
run ./install-prereq.sh
run ./start-flash.sh
It will ask you to kill dnsmasq and mosquitto ( Say yes )
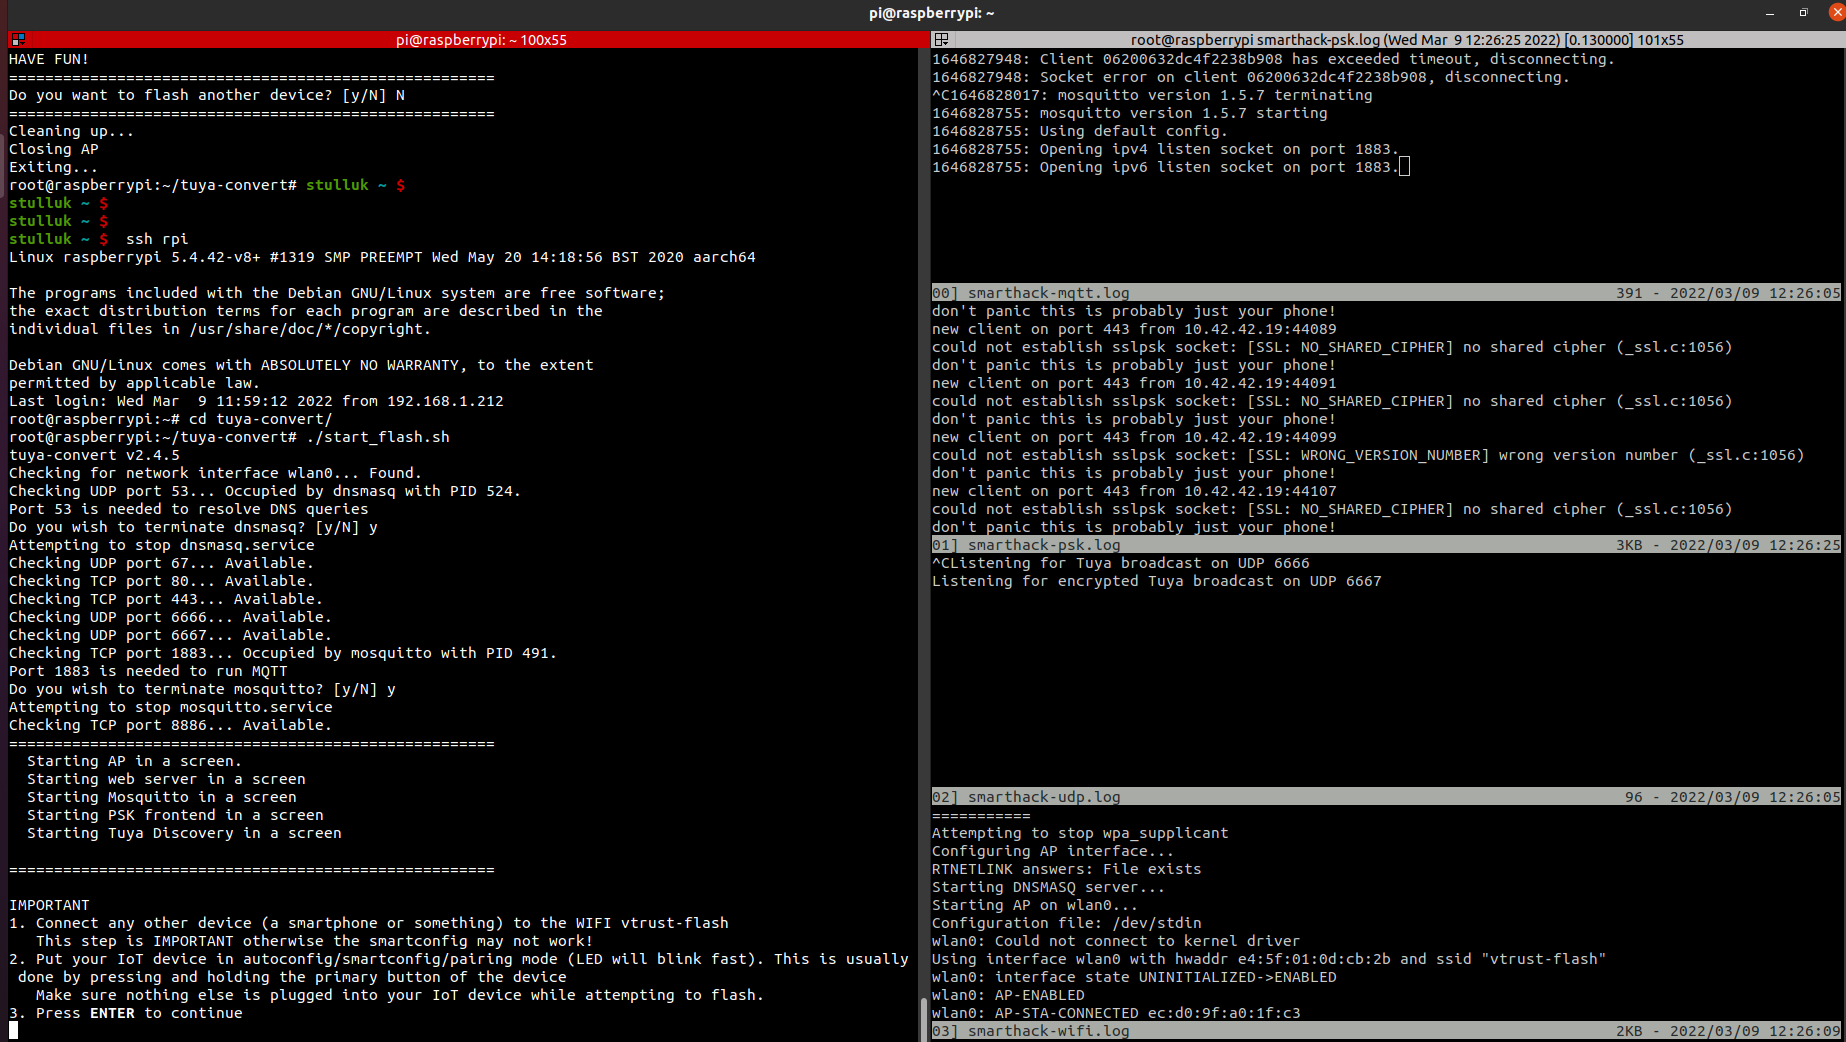
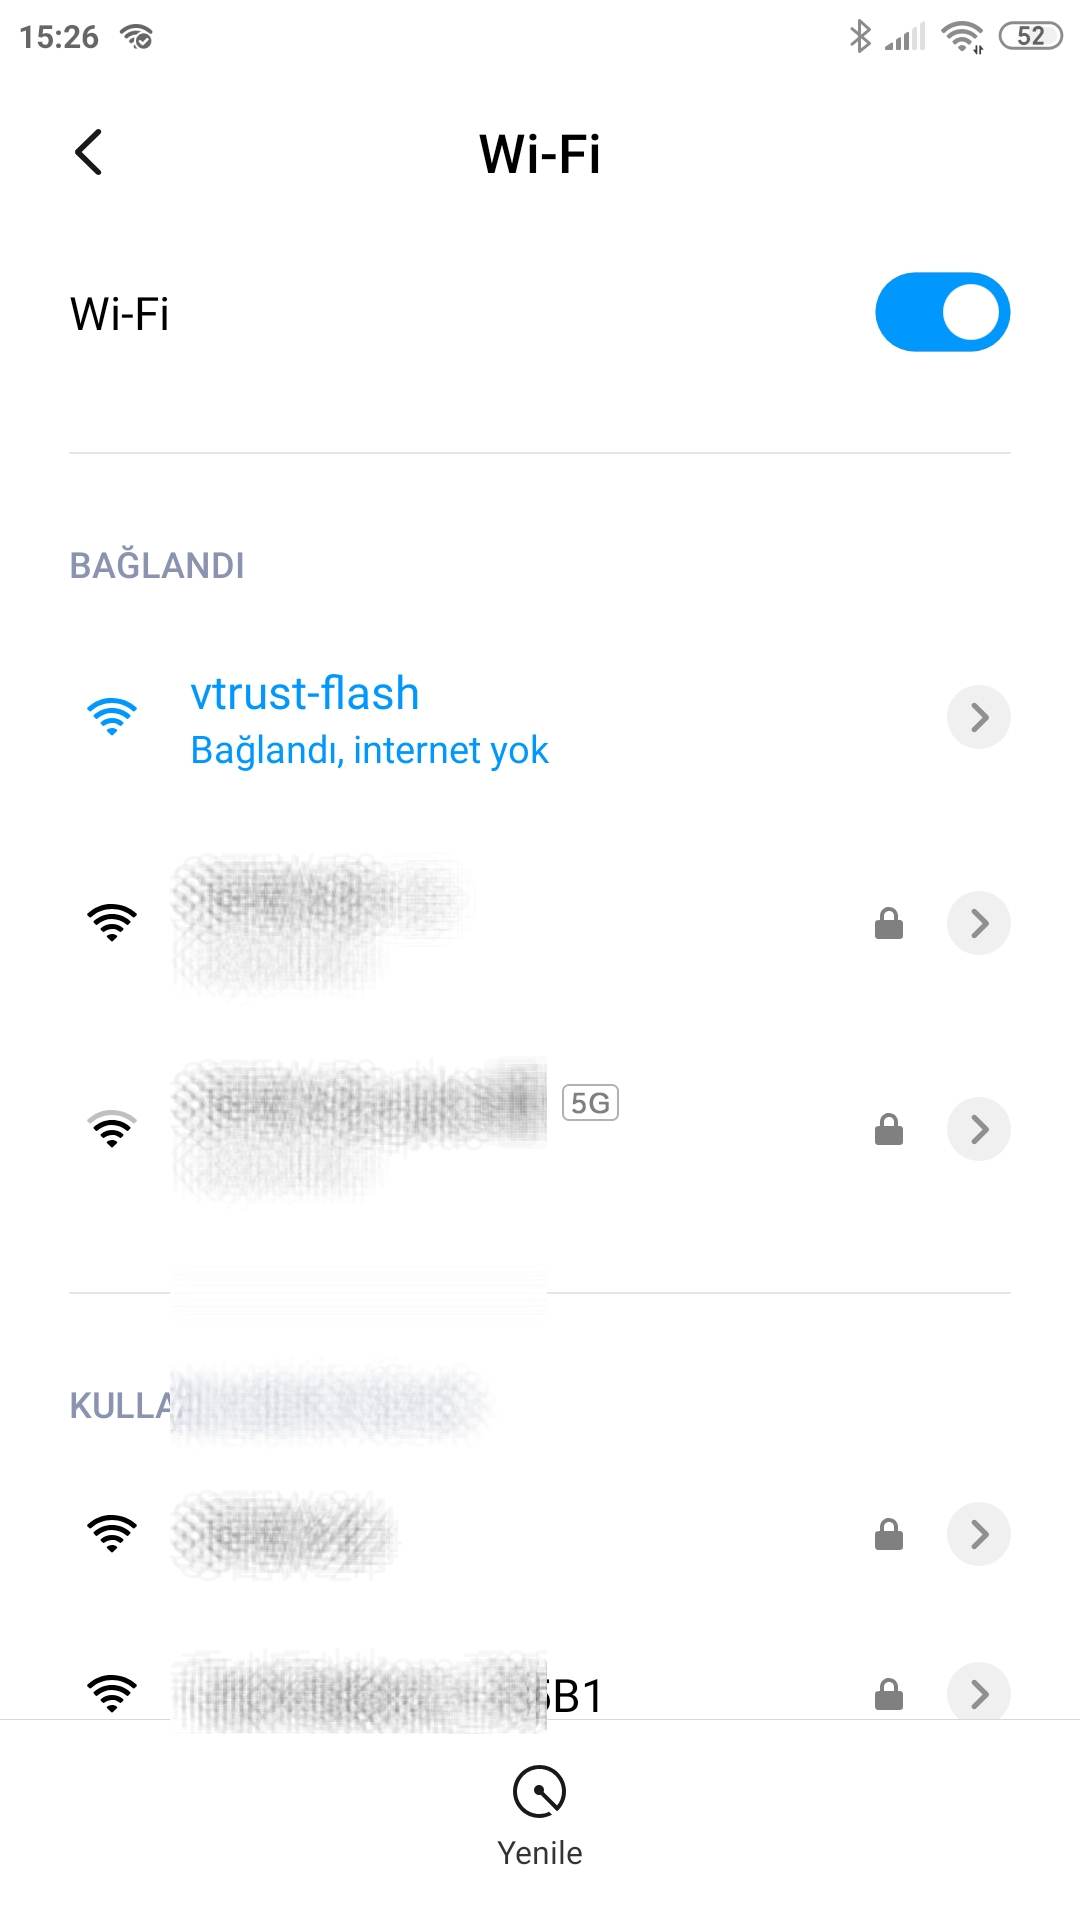
connect your mobile phone to “vtrust-flash” SSID. Don’t forget to press tick on the top right corner if appears.
press and hold the button on the Neo Powerplug for 5 seconds, so that its RED led will blink
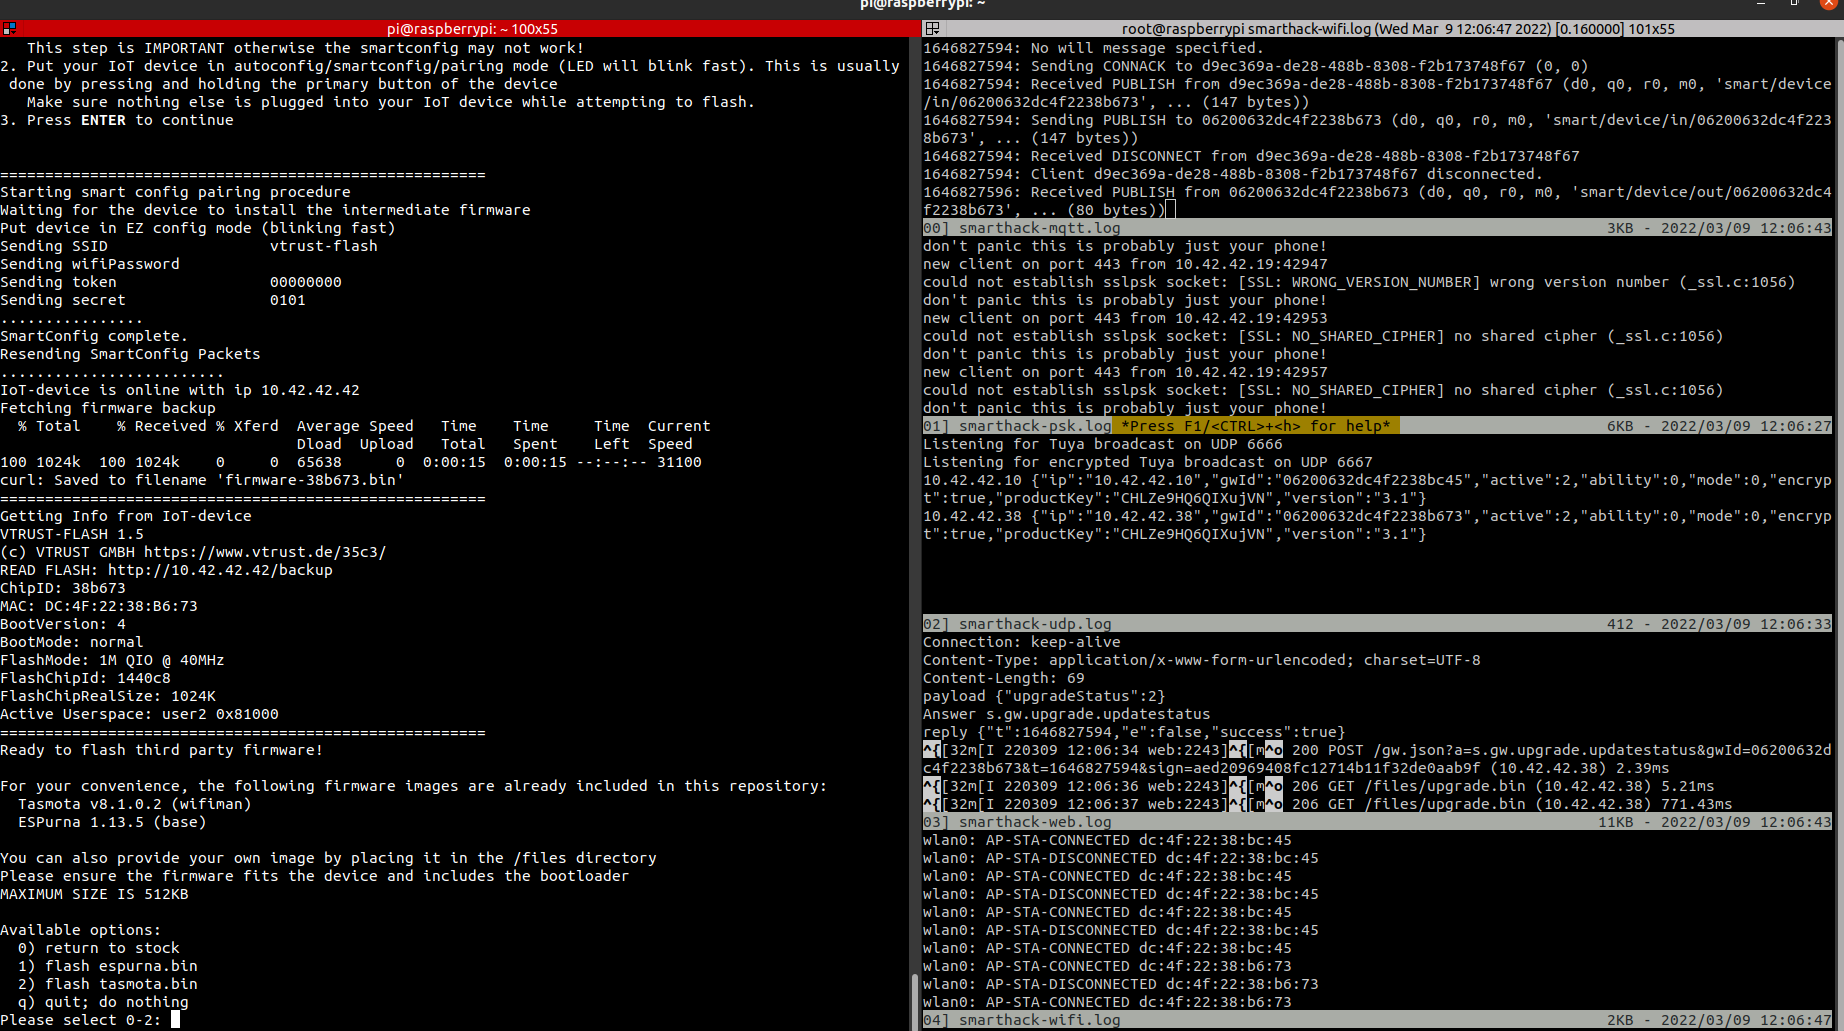
press enter on the screen and wait for about 2 minute
It will find the device and install intermedia firmware
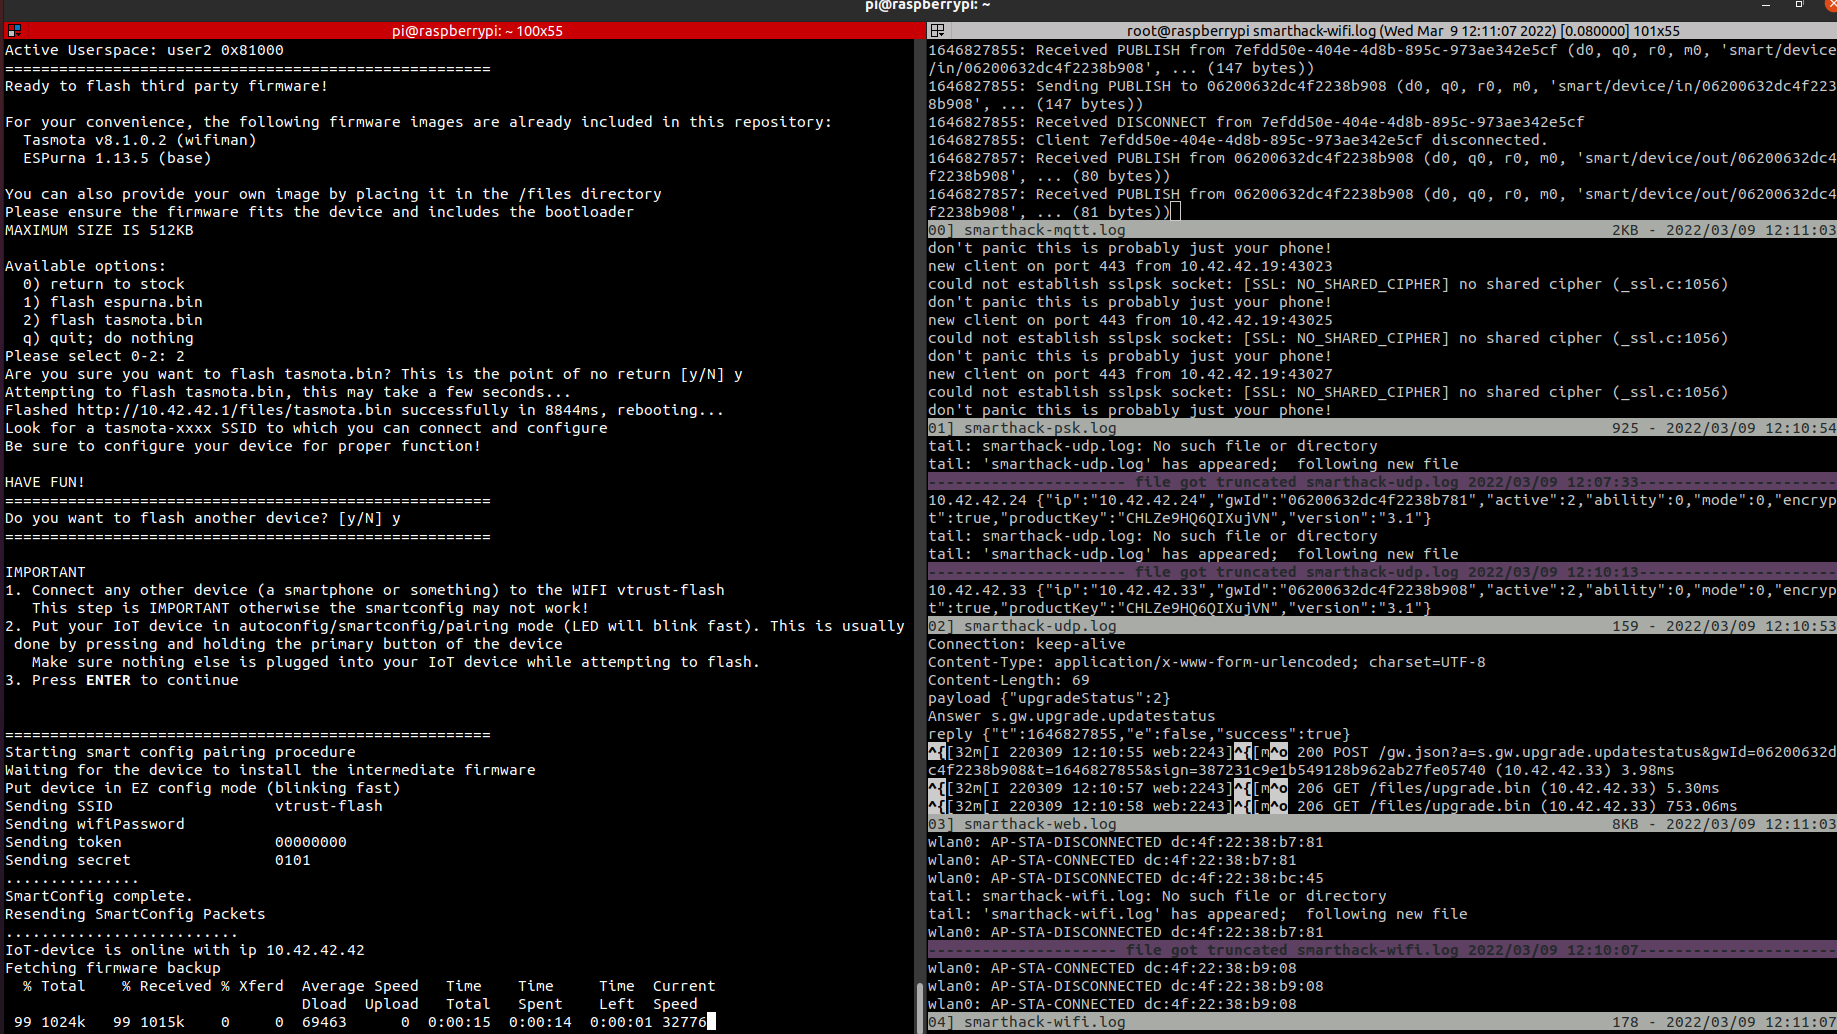
Then it will ask you if you want to install tasmota to it or not
After installation, you need to connect to Neo PowerPlug with its wifi. You can find it on your mobile wifi search
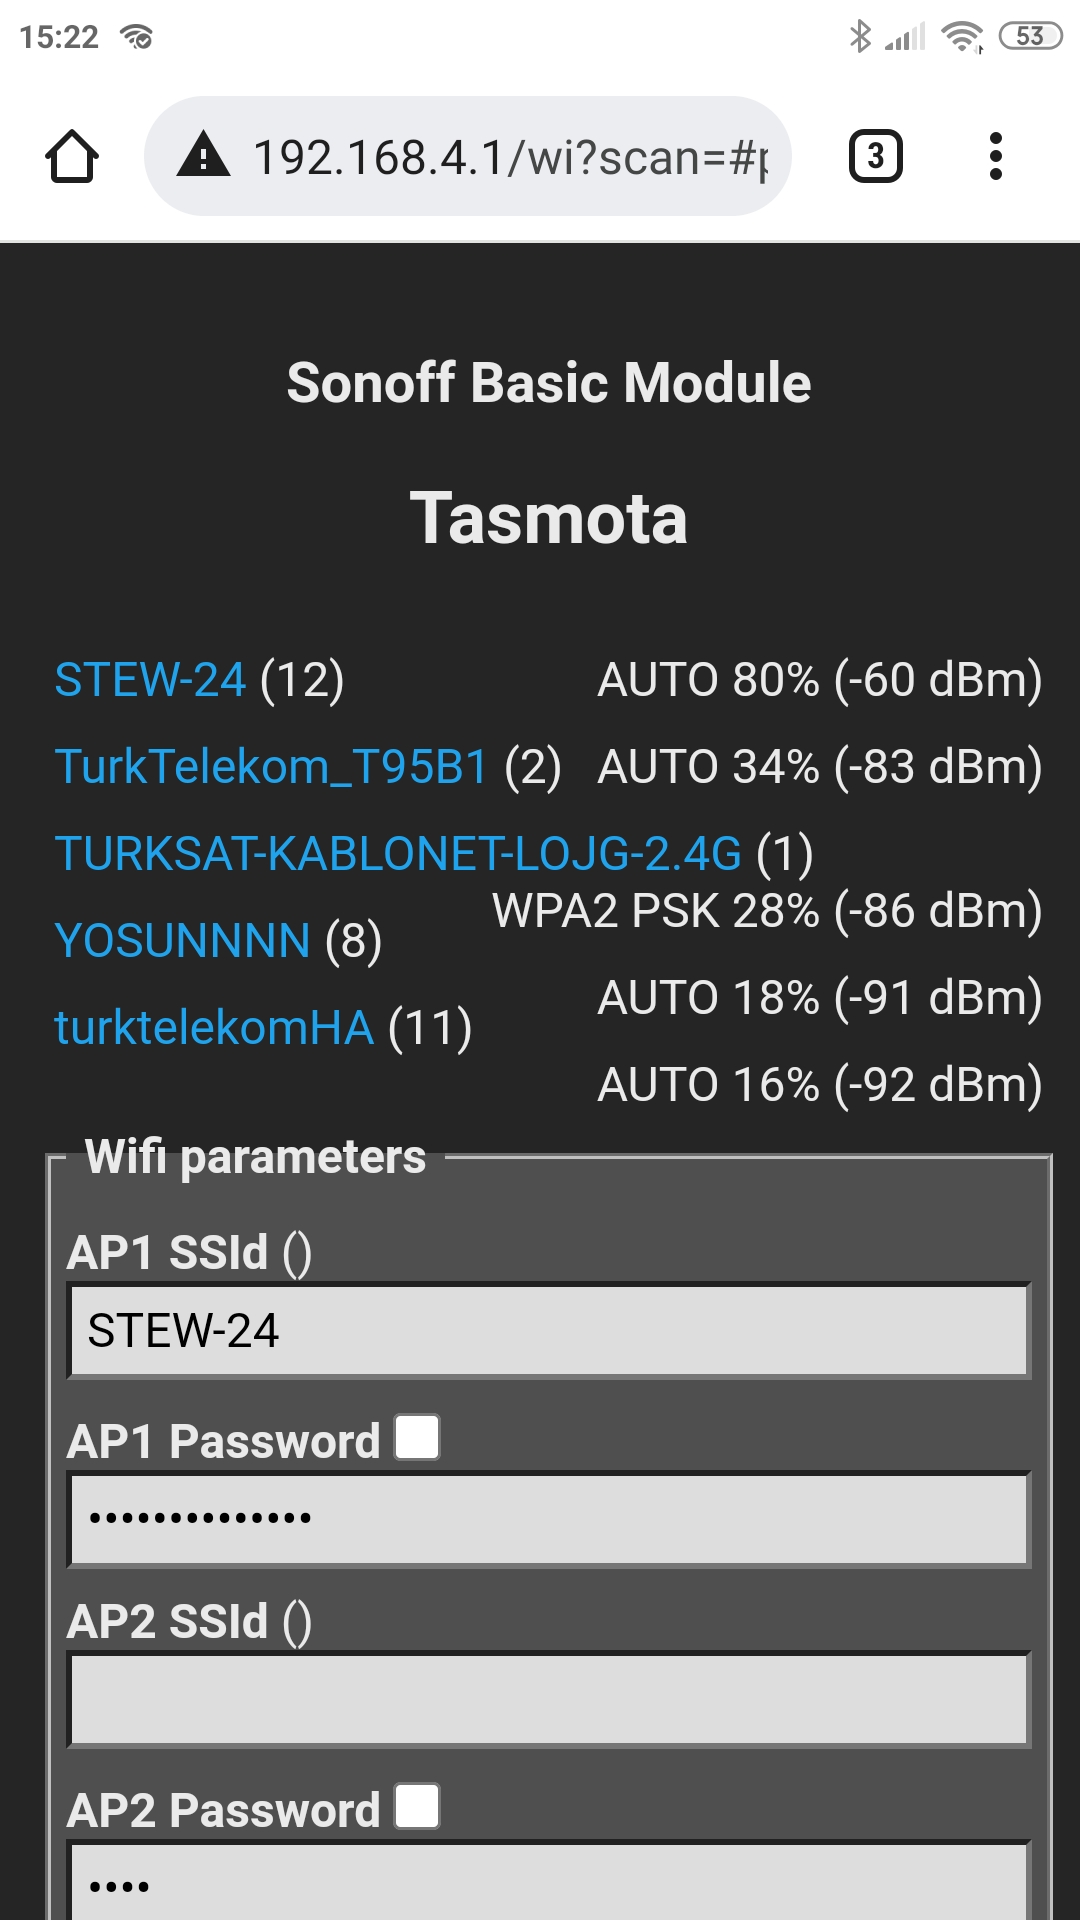
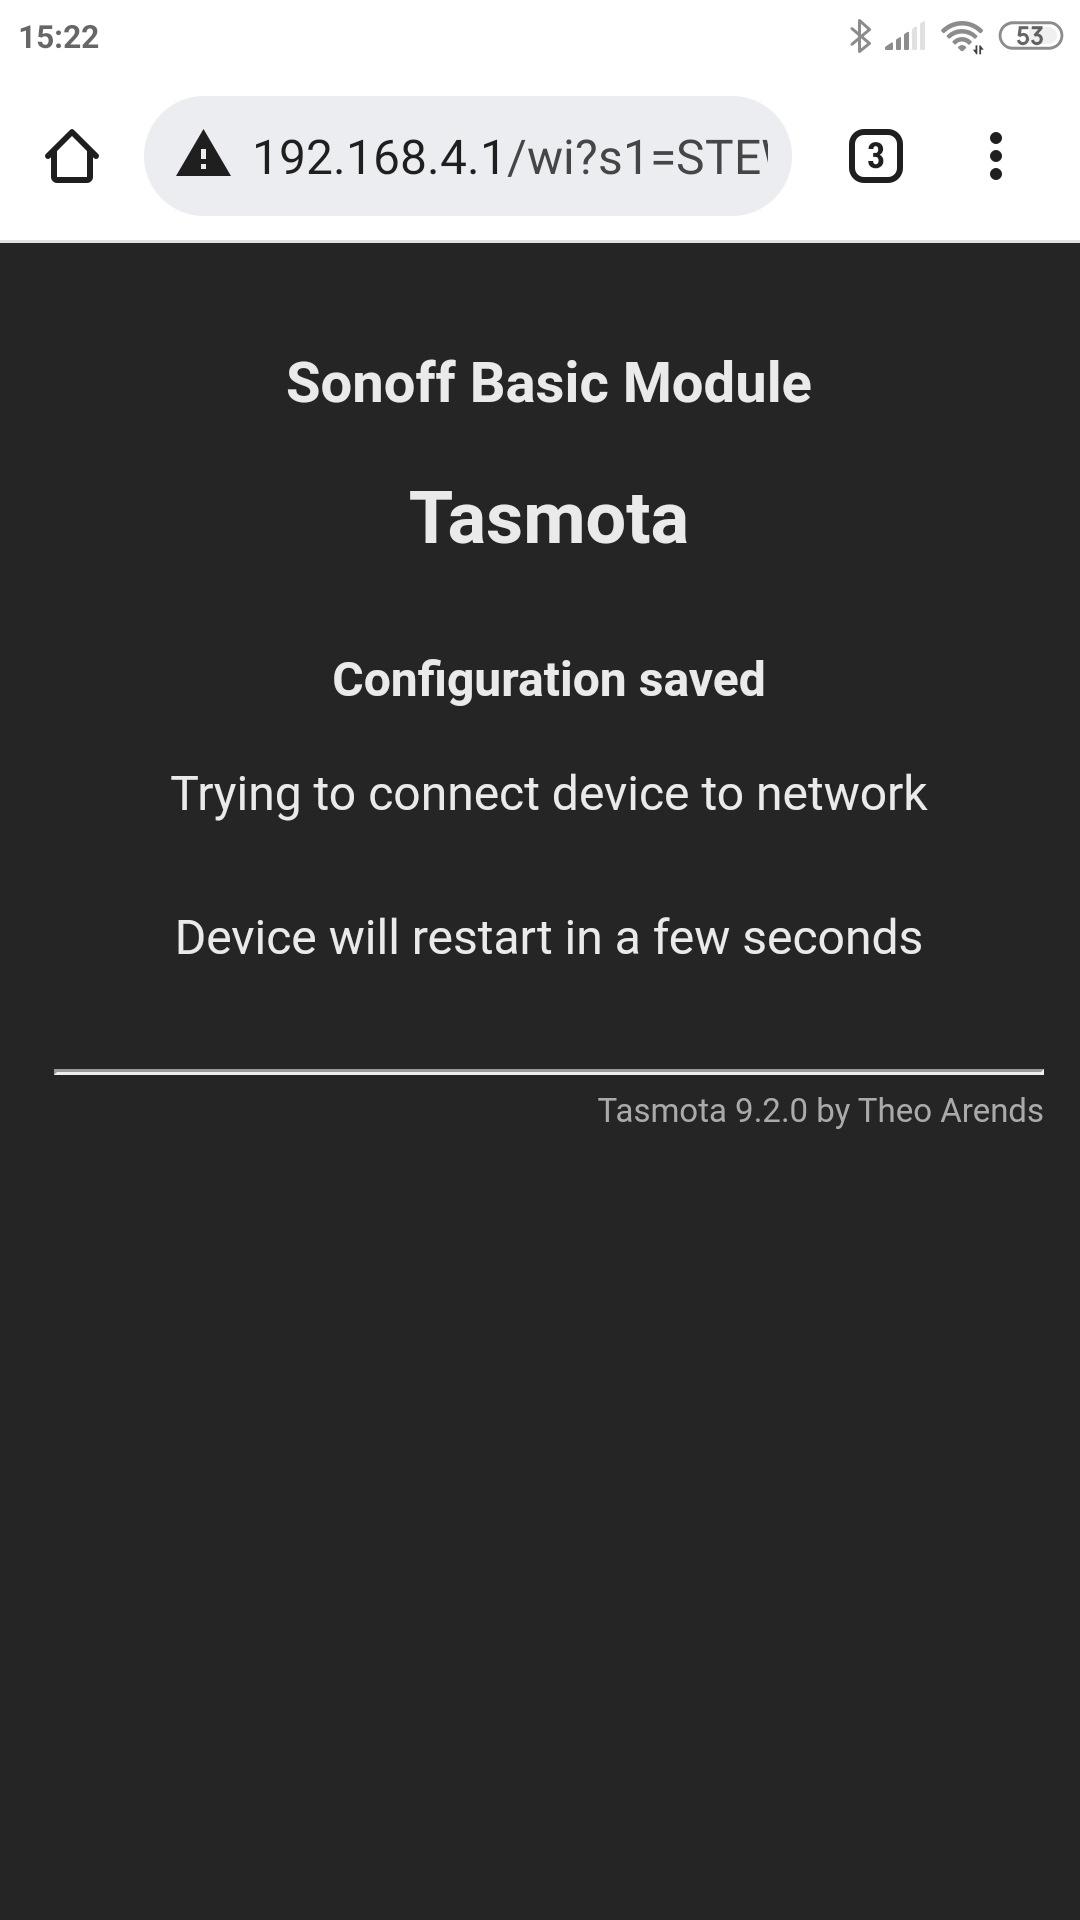
After you connect to Neo Wifi, open 192.168.4.1 on your mobile phone browser.
Enter SSID (2.4Ghz one ) of your home and its password
Save. It will restart. Your phone will disconnect from it, and will automatically connect to your home network
Your Neo PP will connect to your Home WIFI and will get an IP address given by your DHCP server. You need to find this IP by yourself ( There are many ways to find it )
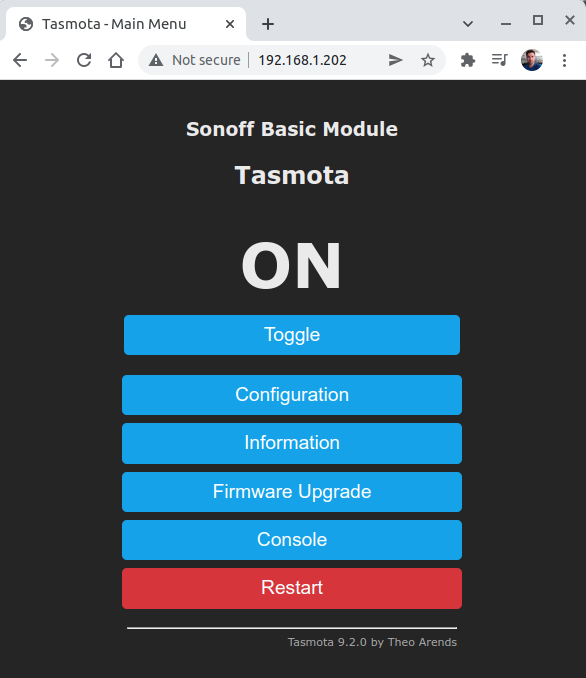
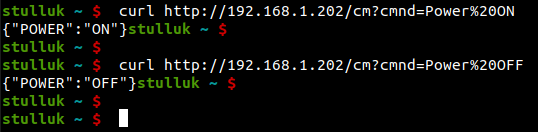
Your Neo with Tasmota is ready to use. You can open its webpage via its ip address and trigger the output ( ON / OFF ) or setup a timer to shutdown power at predefined time.
I am sharing screenshots of this process below.
Here are some screenshots: